Celerway GO - Basics
The Celerway GO device
SIM cards
Make sure that SIM cards are inserted when the GO is powered off.
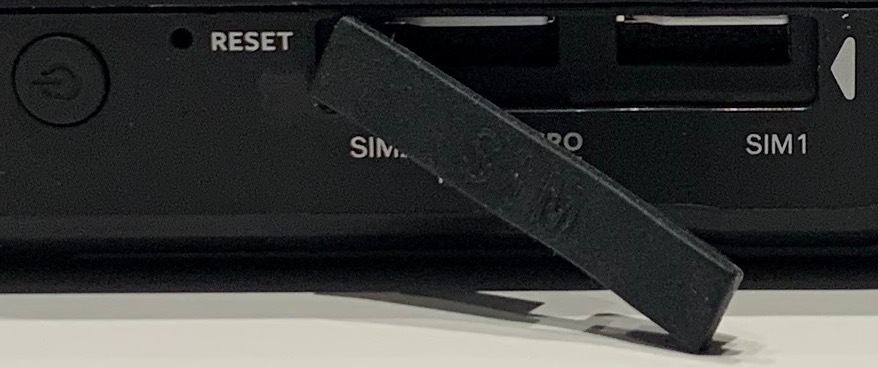
GO uses the micro SIM size. Direction of the SIM card is as illustrated on the device.
Open the SIM rubber protection from right to left as illustrated with the arrow. The rubber protection is fixed to the GO in the left corner.
For the GO version with one modem (SIM), the SIM slot will be towards the right side under the rubber protection.

Power button
Push the power button (to the left) in 5 seconds to power on the GO. It will be fully booted and online about 1 minute after it has been powered on.
If you push the power button very quickly, the 4 LEDs under the battery illustration will indicate status of the battery. All four green LEDs indicate a full battery.
Charging
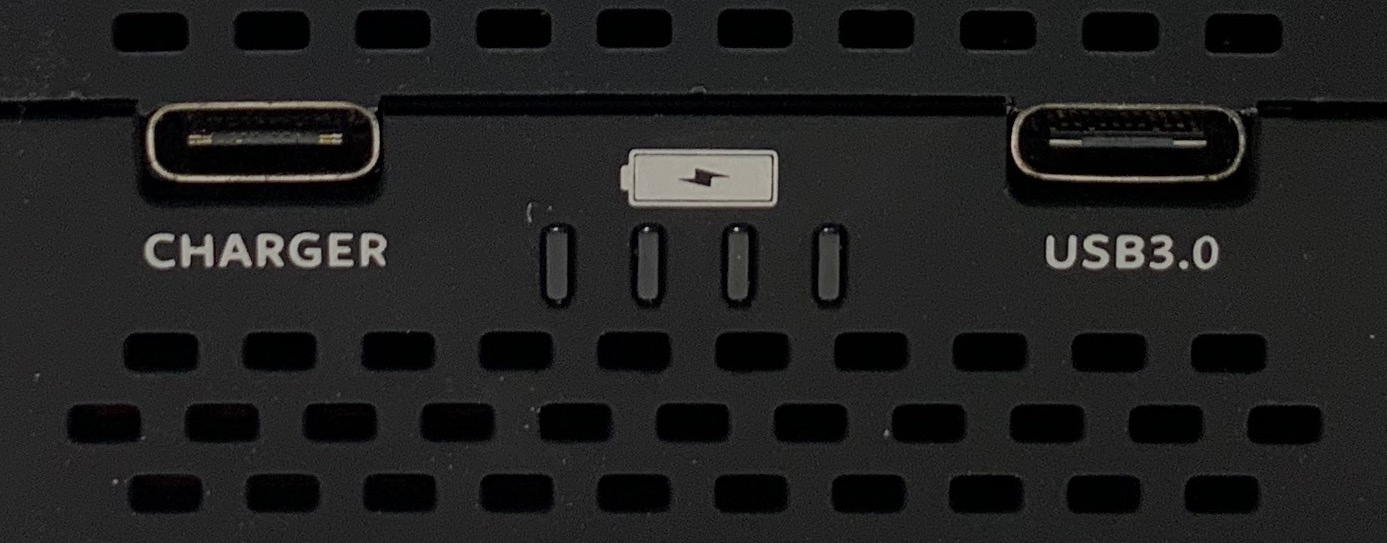
Only use the original charger from Celerway. Stop charging when the battery is fully charged.
The left USB-C port charges the GO battery, while the right USB-C port can charge other devices from the GO battery.
Below the battery symbol, 4 LEDs will indicate battery level when pushing the Power button quickly.
Ethernet ports
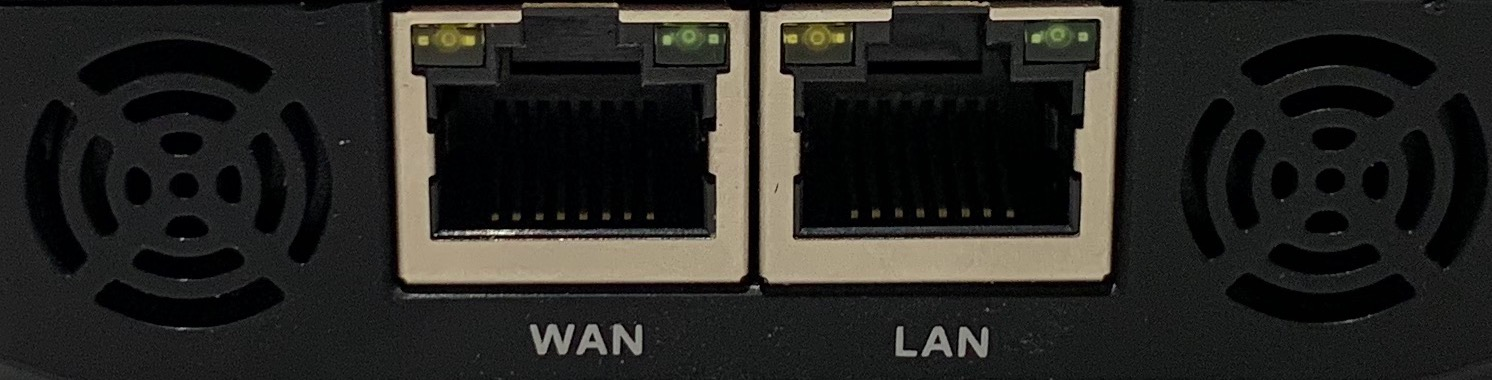
By default one Ethernet port is WAN, which is where you connect the GO to a fixed line Internet source. The other port is by default LAN, which is where you can connect your laptop or other devices that should access Internet via GO.
NOTE: your IT administration can have configured the ports differently, both being WAN or both being LAN. They can also be configured to only connect certified devices (e.g. laptops) to the LAN port. Ask your IT administration if the port does not behave as described here.
Cooling
Celerway GO is a powerful enterprise router that has been shrunk to a handheld device with battery. Under heavy operation and in warm environments, it needs to be cooled to protect battery and other hardware components. Fans are installed on each side of the Ethernet ports. By default the fans will run on certain intervals, which can be tuned in the router configuration menu. Furthermore, the fans will run automatically if the temperature reaches a certain level.
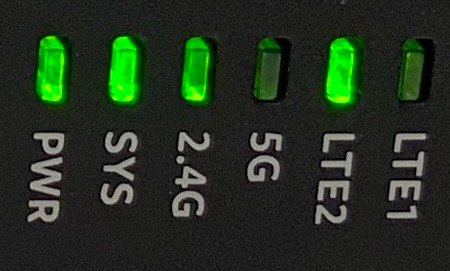
LED signals
On the side of the GO you find some LED signals that are green if the function is OK.
- PWR: It is powered ON.
- SYS: The software run as intended
- 2.4G: The 2.4GHz Wifi radio is on
- 5G: The 5GHz Wifi radio is on
- LTE2: The SIM2 modem is connected
- LTE1: The SIM1 modem is connected
Connect to the GO
Via Ethernet
Connect an Ethernet cable to the LAN port.
NOTE: your IT administration can have configured the ports differently, both being WAN or both being LAN. They can also be configured to only connect certified devices (e.g. laptops) to the LAN port. Ask your IT administration if the port does not behave as described here.
Via WiFi
WiFi login credentials will probably be handed out to you by your IT administration.
If they have not changed the default login, you can connect in the following way:
To connect by WiFi, search on your computer for the WiFi network named CelerwayXXXXXX (where the Xs are digits/letters), and log into it with the password CelerwayXXXXXXtest (where the Xs are the same digits/letters as in the network name).
Basic settings
Access the menu
Open a web browser on a computer or your smartphone.
Type 192.168.5.1/basic in web browser.
User: basic
Password: celerway
NOTE: your IT administration might have changed the address, username and password, and hence will provide you with new credentials.
Easy access from smartphone
When you have accessed the menu, save the web site as a shortcut icon on your home screen. Then you are one click away from the menu.
Configure SIM cards
Often your SIM does not require any special pin code or APN settings and your online when the GO is powered up.
If that is not the case, follow this procedure.
Access the menu as described above.
In the Modem menu a field to insert pin code will appear. Type pin code and click Unlock.
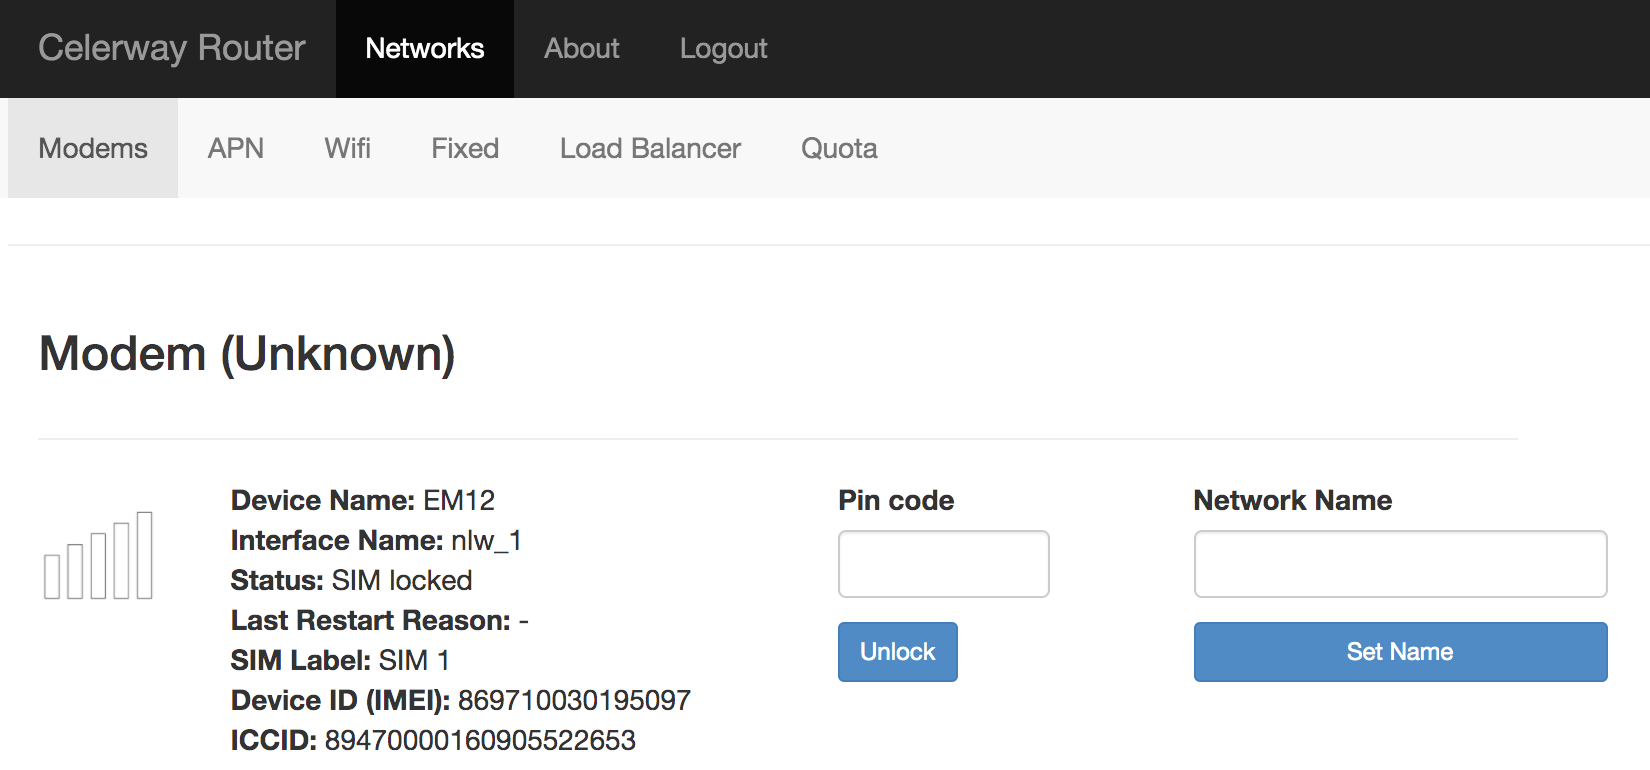
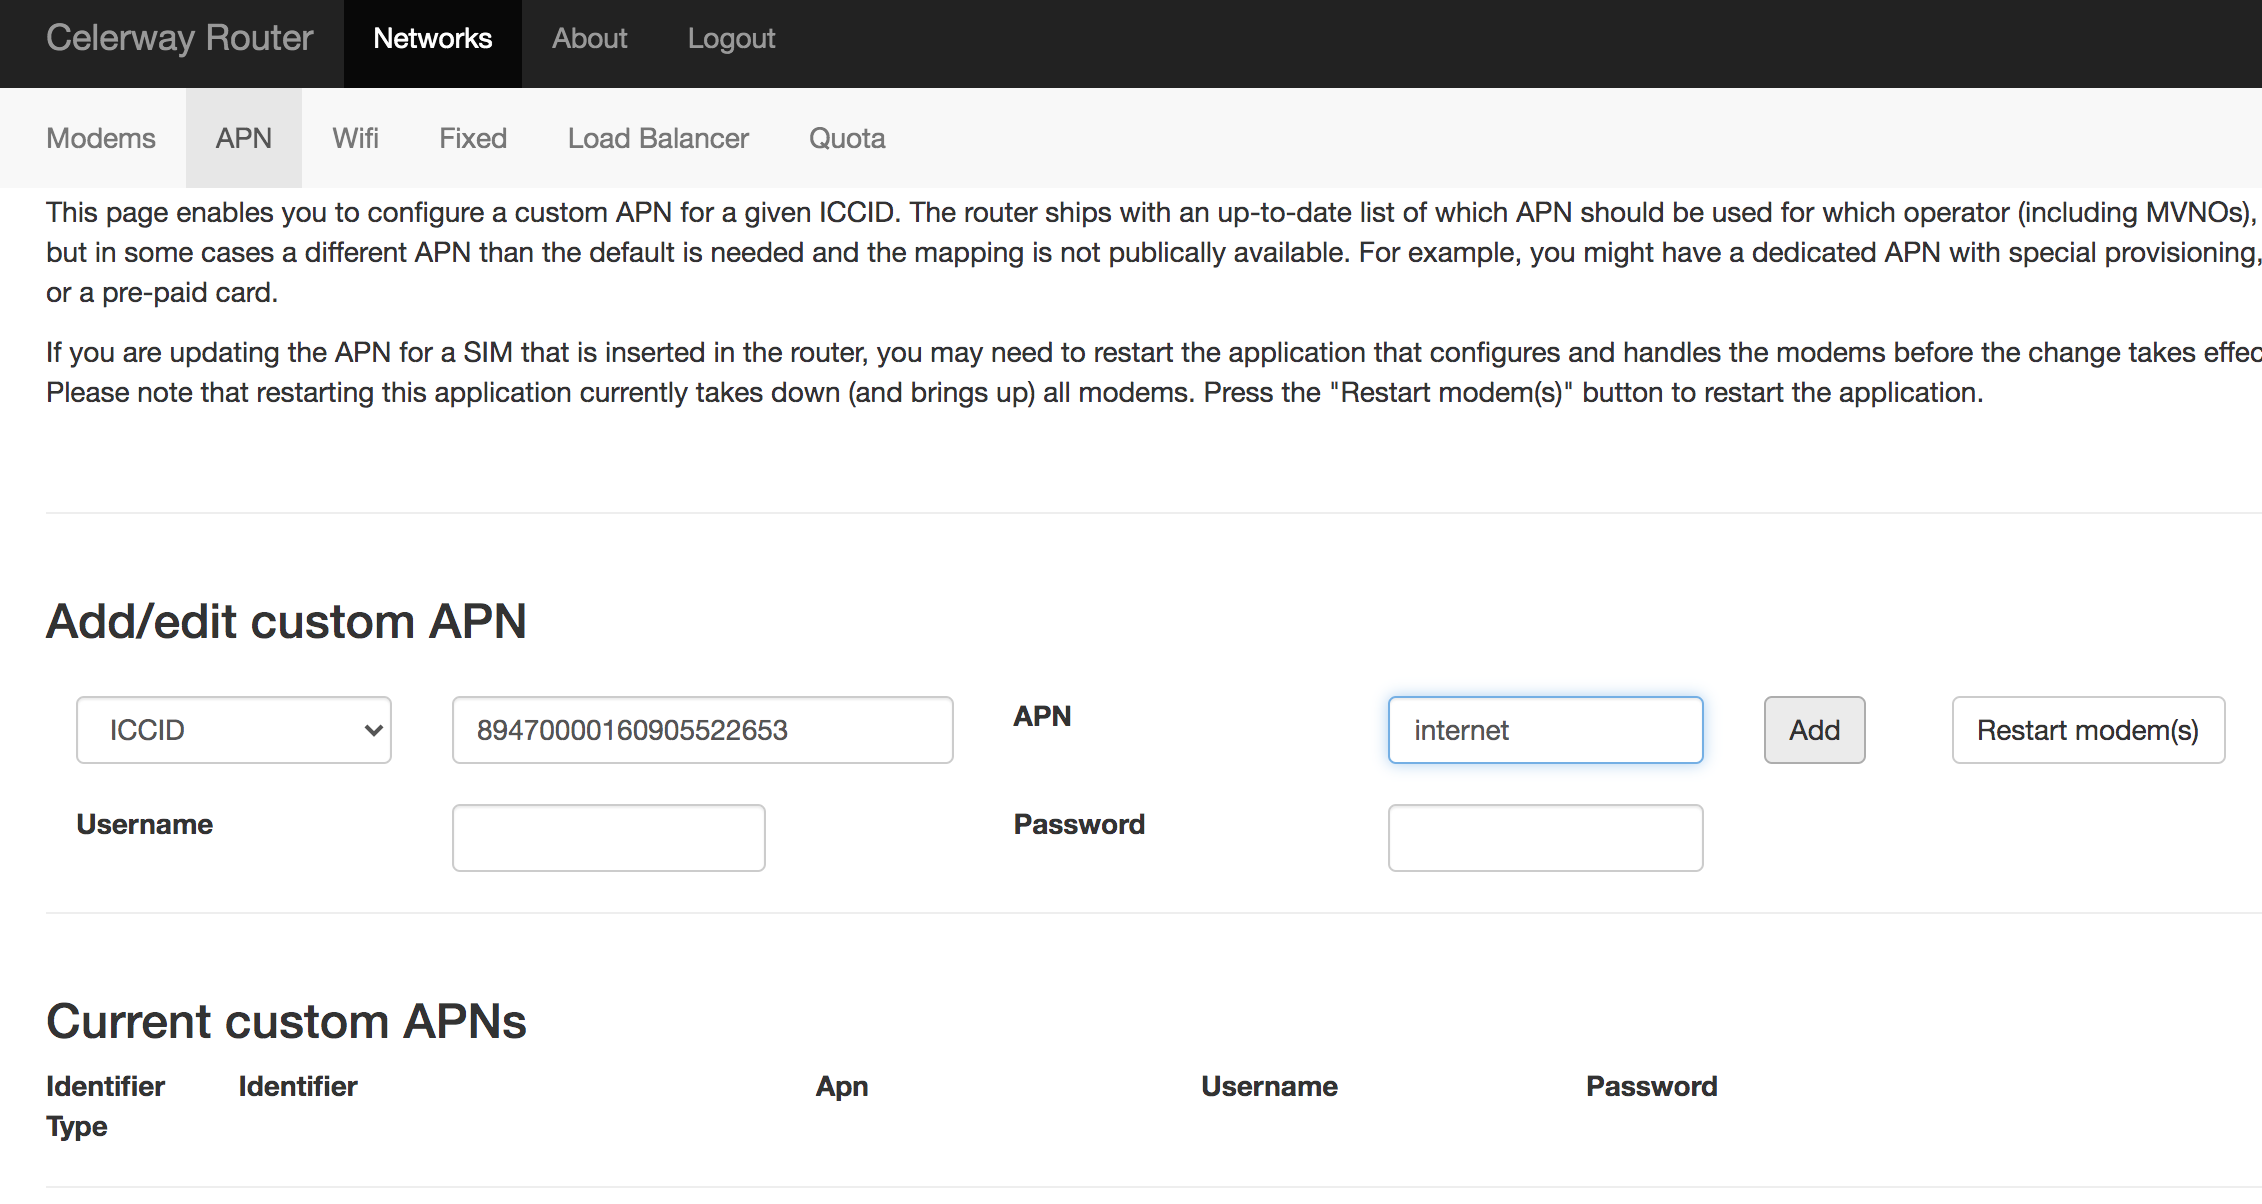
If the SIM card requires a special apn, you can add the APN in the APN menu.
Copy the ICCID number from the Modem menu, and continue to the APN menu
Paste the ICCID into the empty field, and the type the APN in the text field following APN.
Click Add and next Restart modem(s) to activate the APN.
NOTE: that private SIMs/Networks might require Username and password. These can be entered in the same menu.
Configuring WiFi – connecting to public and home WiFi
Celerway GO comes with 2 WiFi radios. One radio can be used to connect to other WiFi networks in order to get Internet connectivity from those.
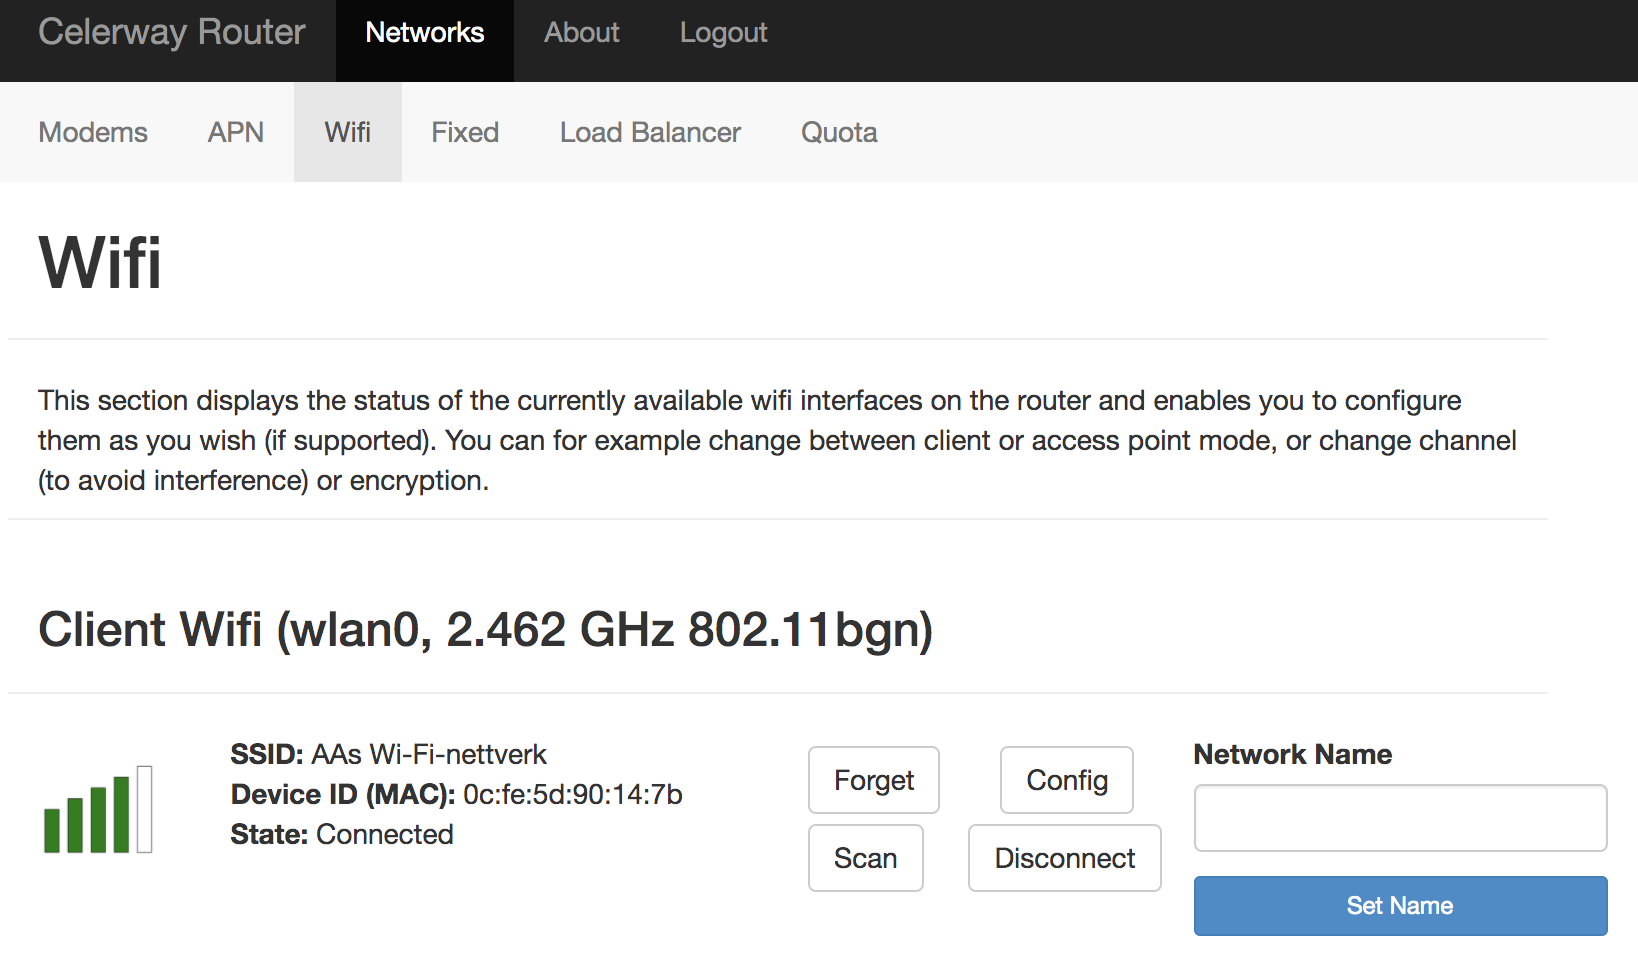
One Wifi radio is by default set in the Client mode so that it can connect to other WiFi networks.
If you click the Scan button, available Networks will appear.
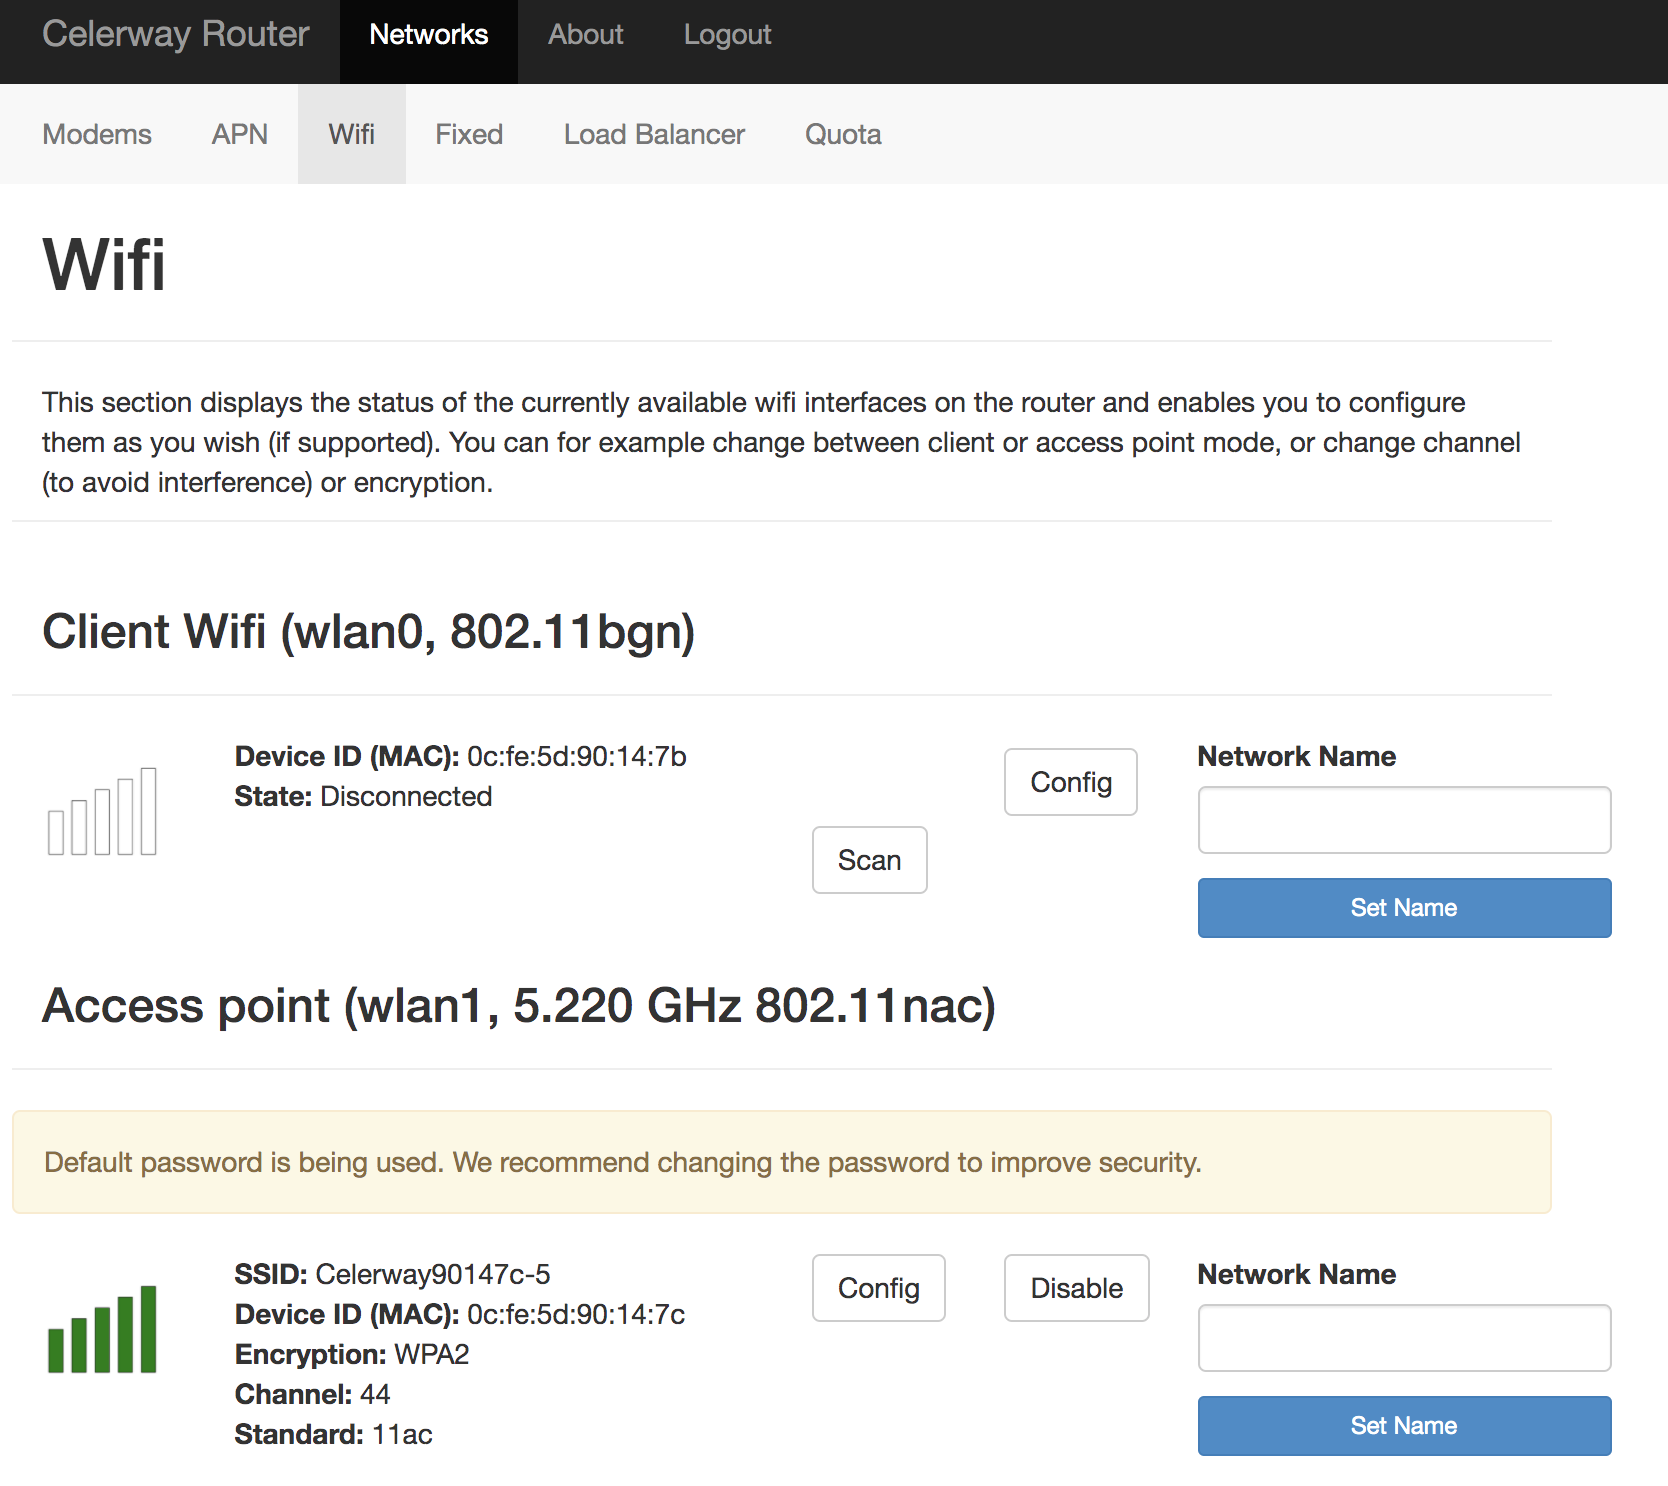
For some networks the password can be written in the same window (click then Connect), but other might direct you to a special login portal. We explain the latter further down.

If the GO connects successfully to the WiFi network, you will see it as connected in WiFi menu.
Connect to WiFi networks behind login portals
Many public WiFis are not based on password authentication, but rather filling in information and accepting terms in a web site portal. Celerway also support most of these solutions.
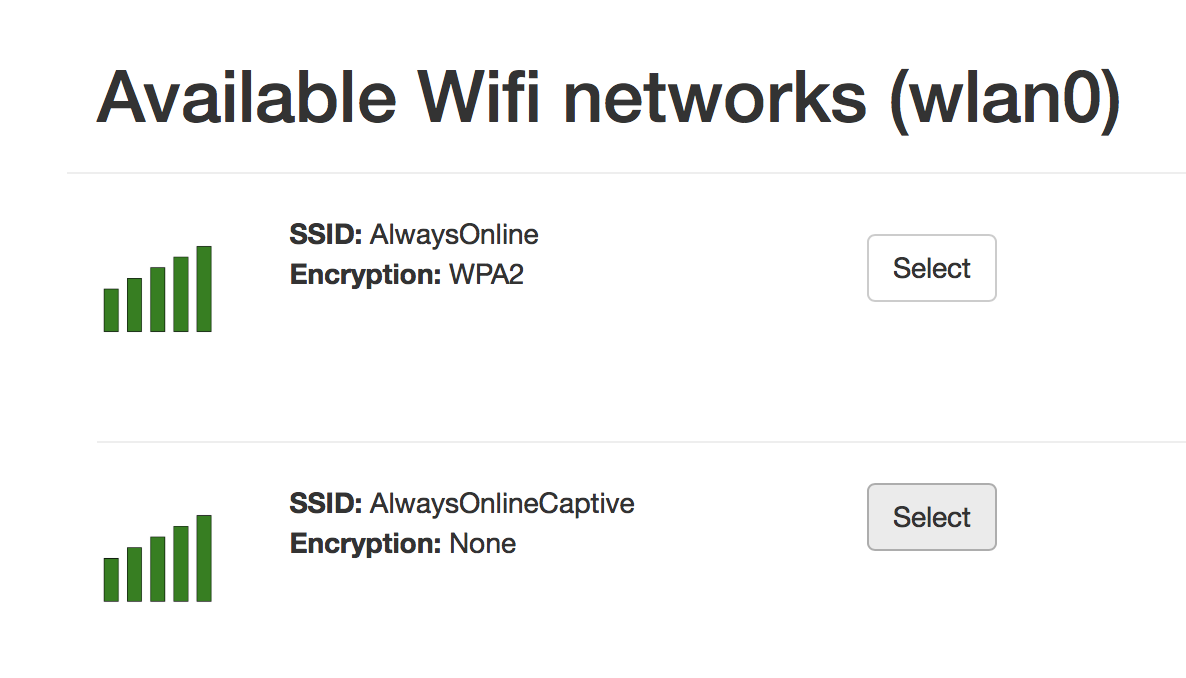
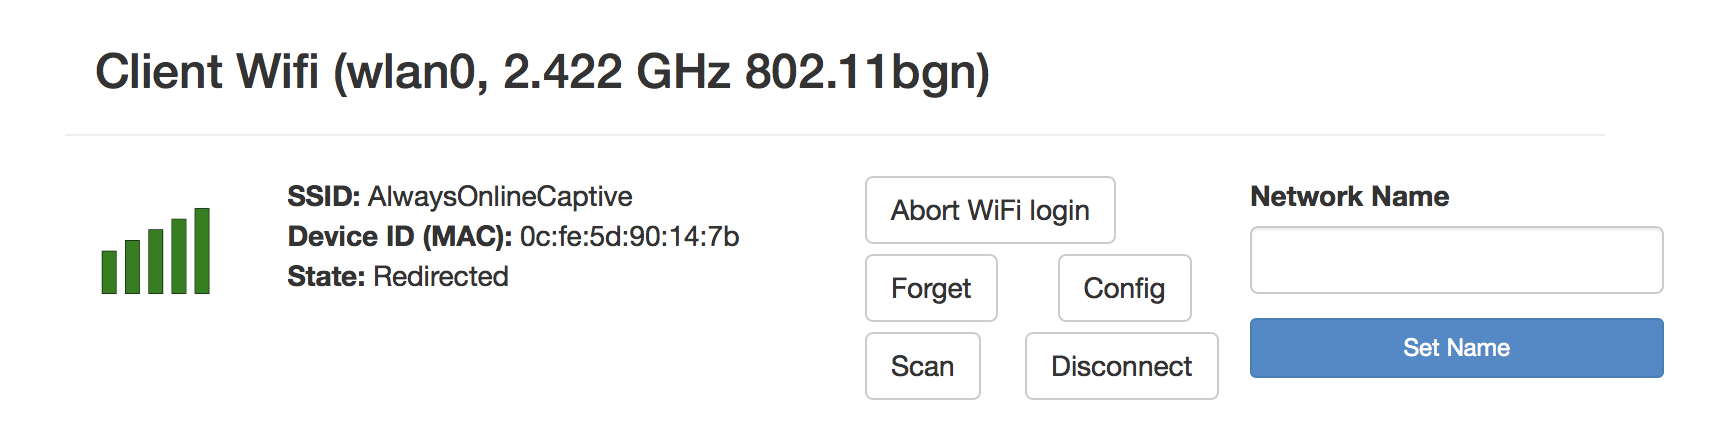
When you do the scan as described above, you also Select the network you would like to connect to. In the example we connect to AlwaysOnlineCaptive, which you see have none encryption. That is often the case with portal logins.
After having clicked Select, you are taken back to the WiFi menu again, and a new button has appeared: Continue WiFi login.
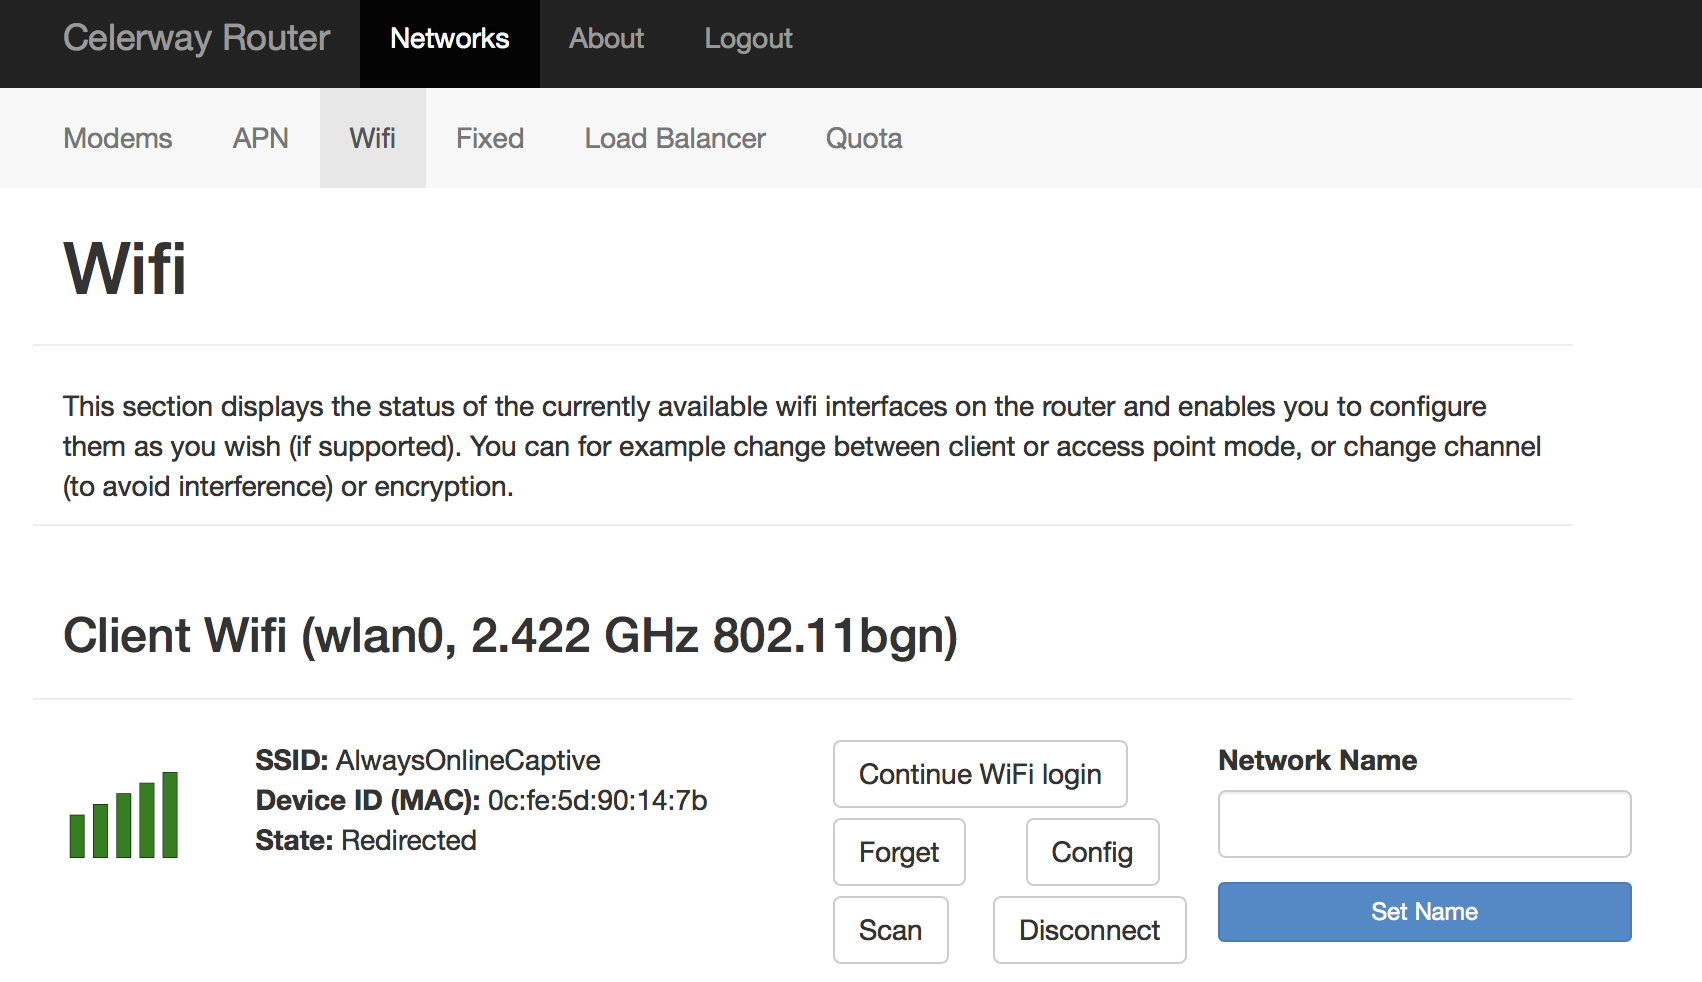
When you click the Continue WiFi login button, you are redirected to the login portal of the WiFi. Note that this will pause your Internet connection until you have compete as explained in the warning that pops up (Click Continue).
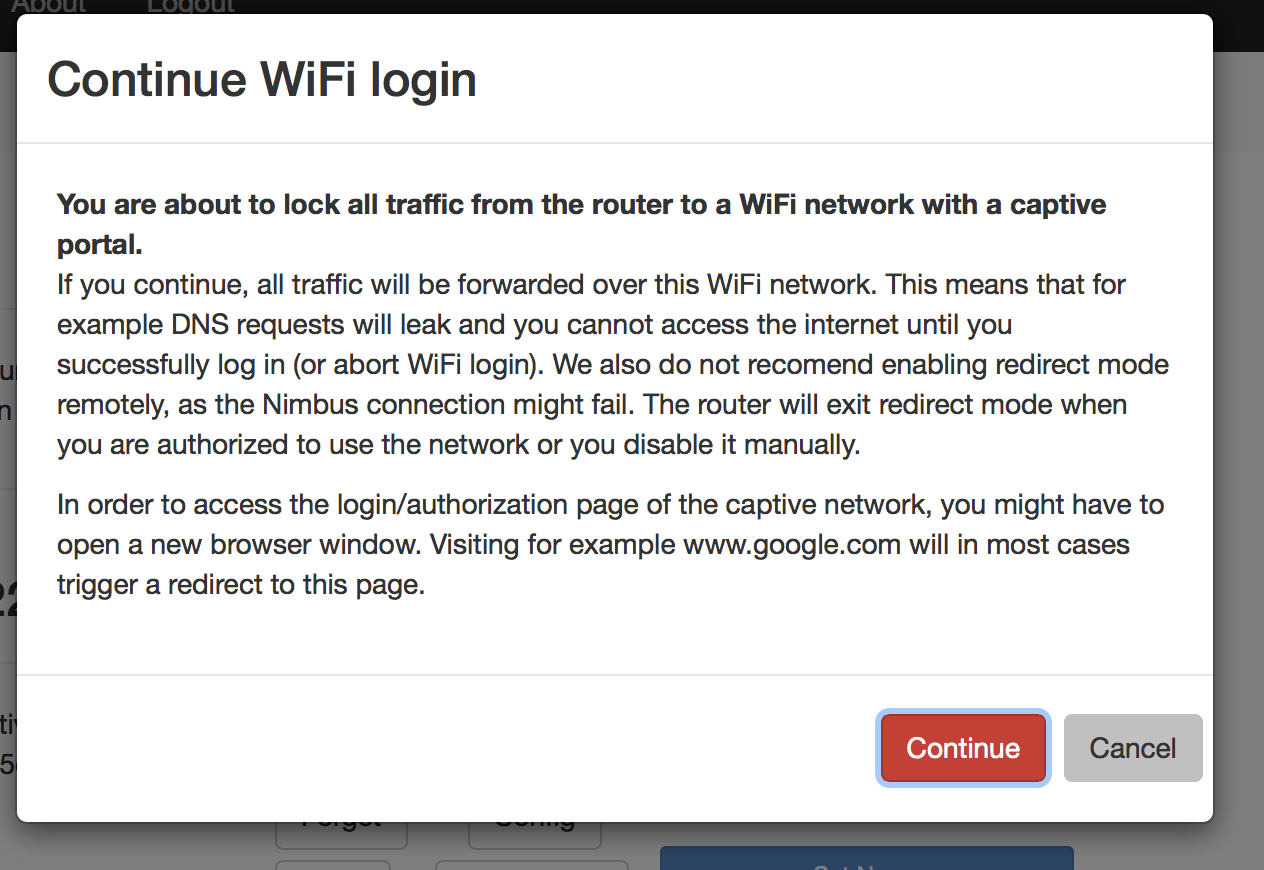
Now, the login portal should show up for you to complete. Note that if your browser blocks popup windows, you might need to accept the portal to appear.
If the login for some reason should not be successful, you should abort the process using the button Abort WiFi login in order to enable Internet connectivity again.
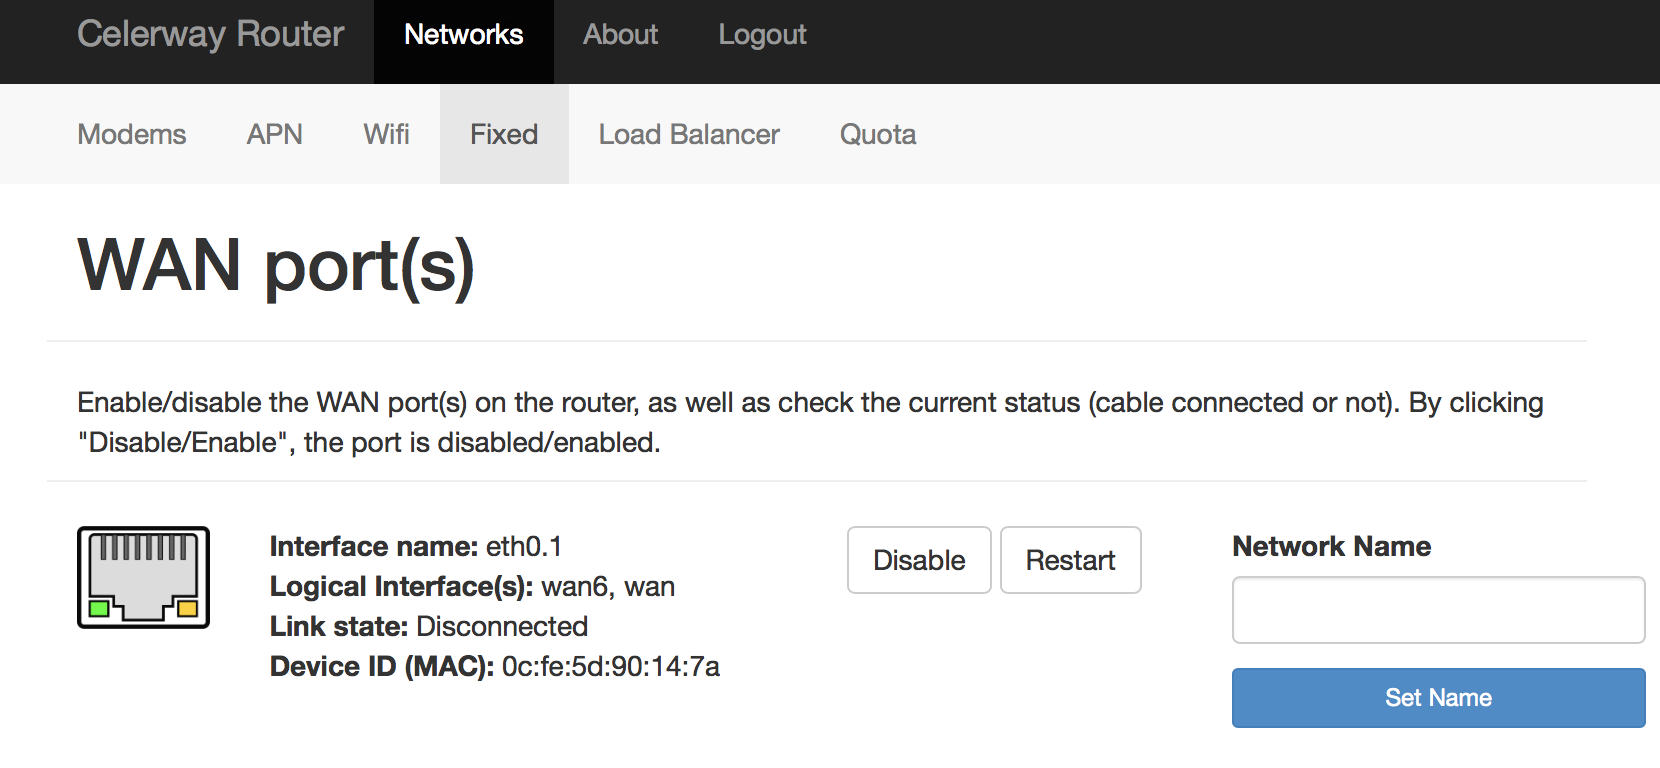
Ethernet WAN port
The Fixed menu shows that status of the Ethernet WAN port.
It will display Connected if an active Ethernet cable is inserted.
This is the port where you get Internet from a fixed line.
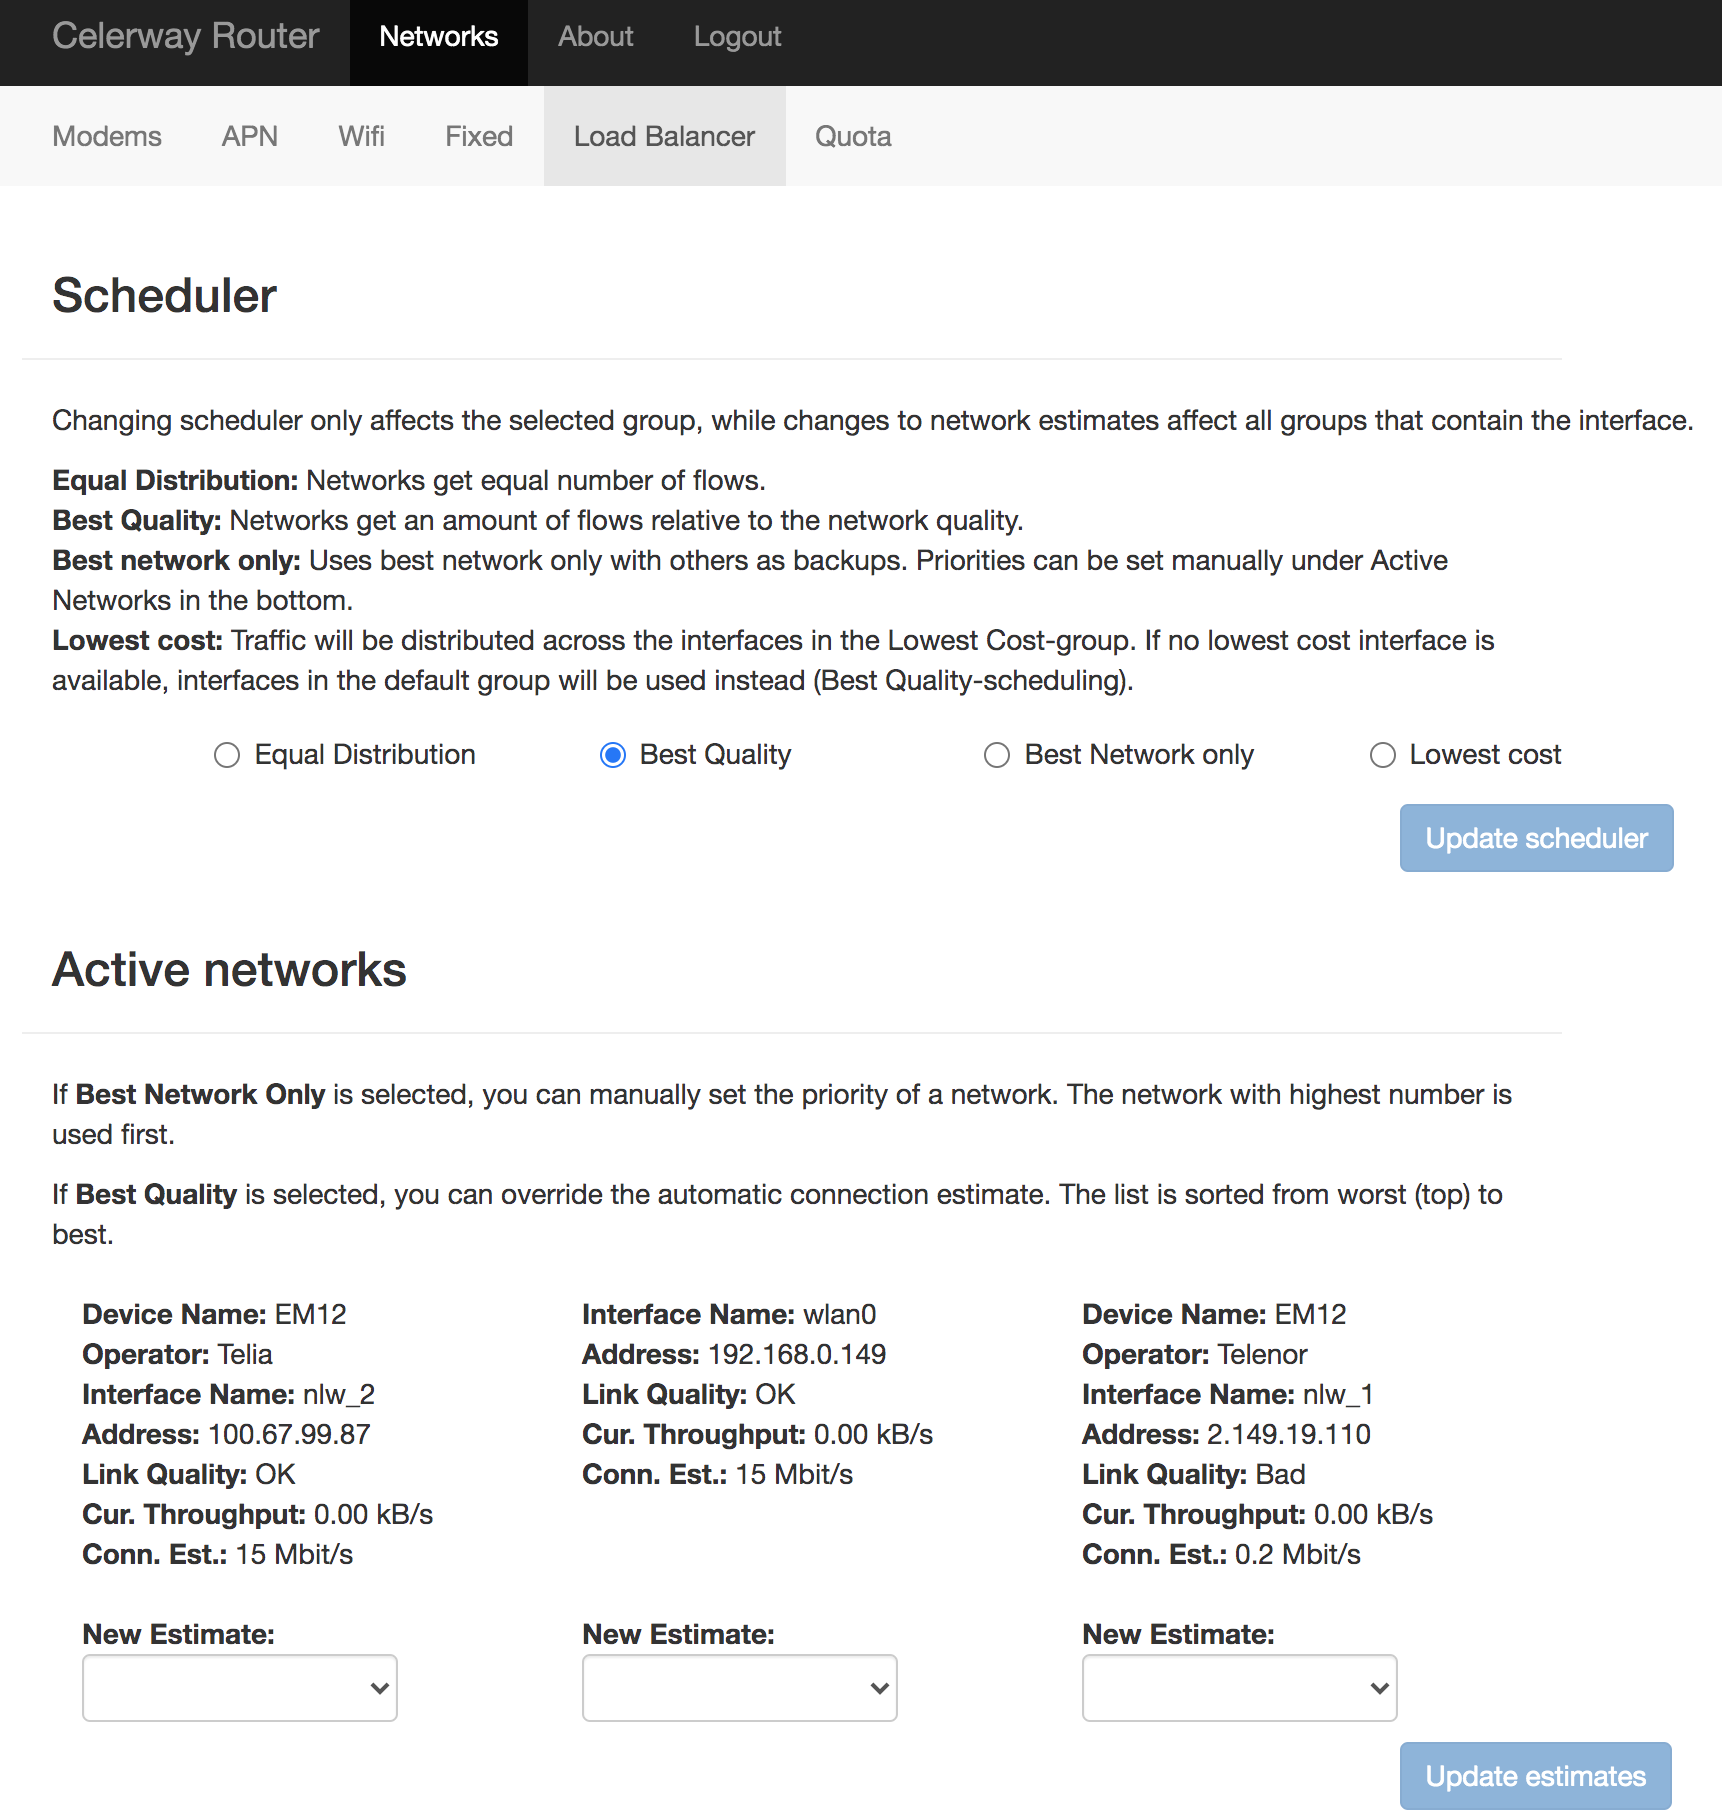
Load Balancer
This is an advanced menu that probably your IT administration has configured.
Here you can decide if all available networks should be used simultaneously or one by one as primary and backups.
In the bottom, you see the Active networks, which means networks that have passed a certain quality level and that GO will then use to transfer data. In the example you see 2 modems/carriers and one WiFi networks as active.
The Telenor Operator has low quality as you can see the GO has set the estimated capacity to 0.2 Mbit/s.
Under the Scheduler you choose how to use the networks.
In the example, GO is configured to use Best Quality, which means it uses all available best networks in the most optimal way.
NOTE: If your IT administrator has configured Phantom VPN with scheduling policies, changes in this menu will not have any effect.
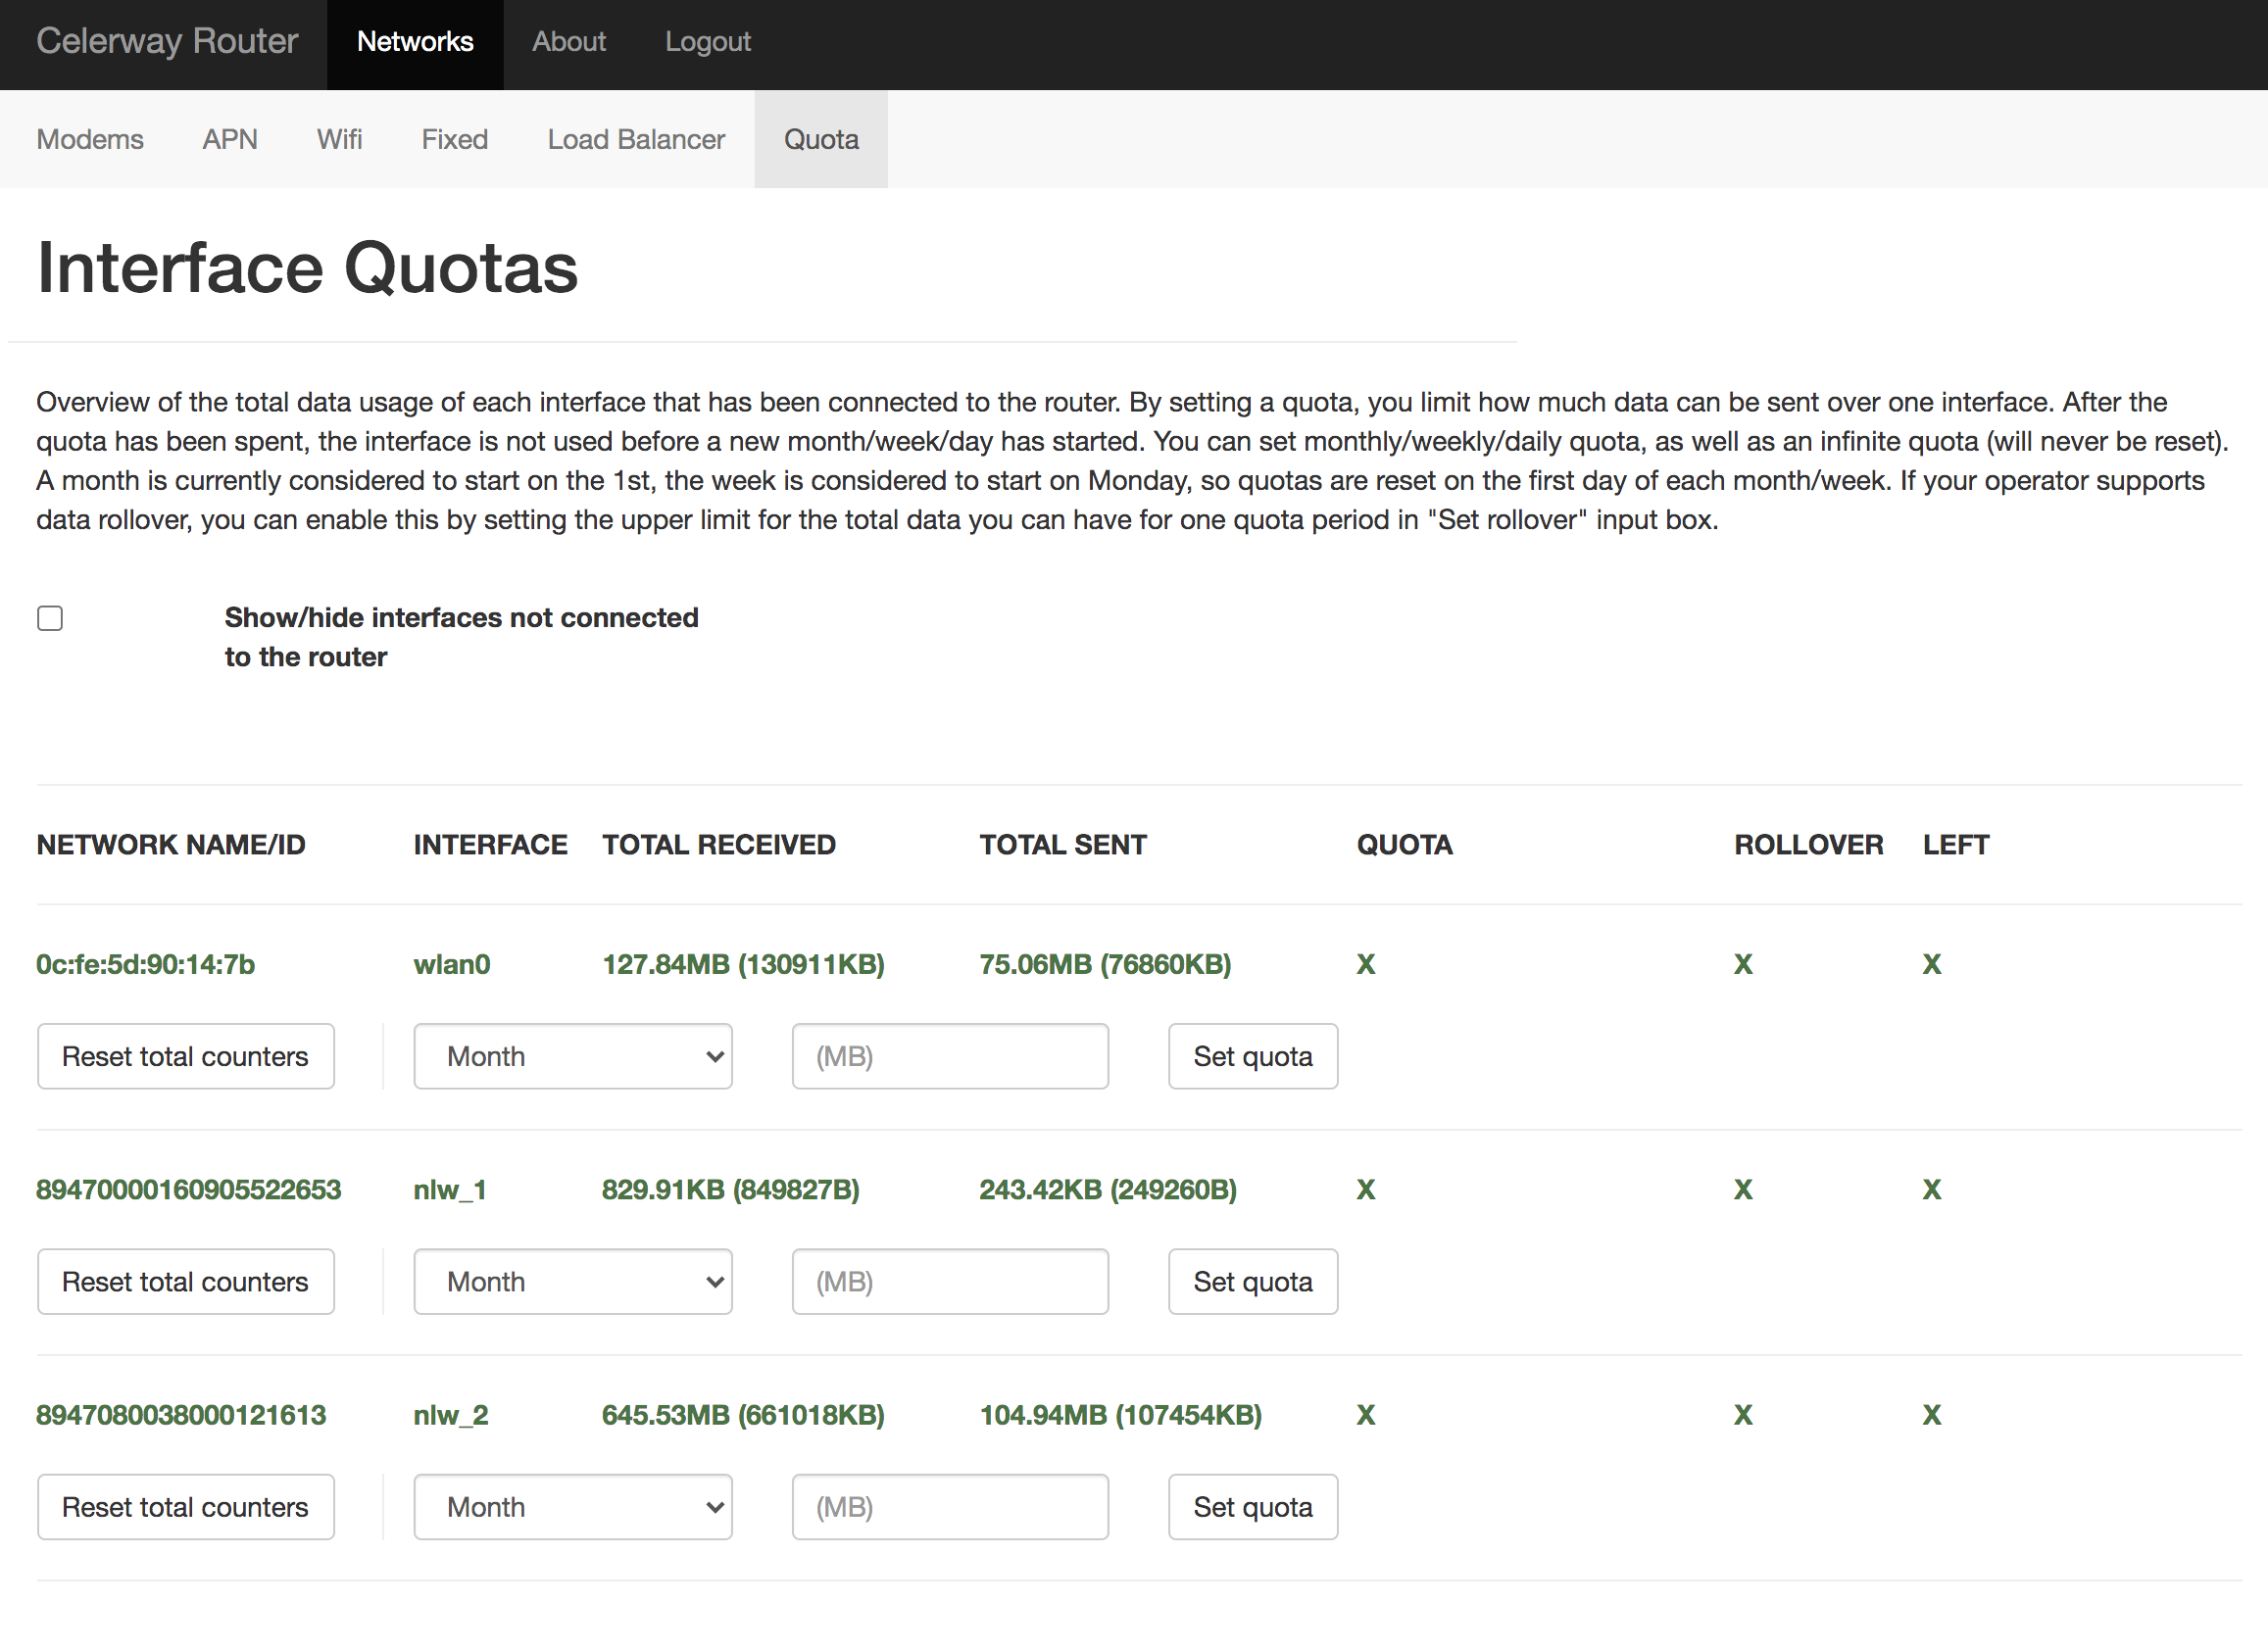
Data Quotas
In this menu you can set the data quota in Megabytes on all networks, including the SIMs.
The GO will not use a network if the quota has been used up. You set the quota in the field marked (MB).
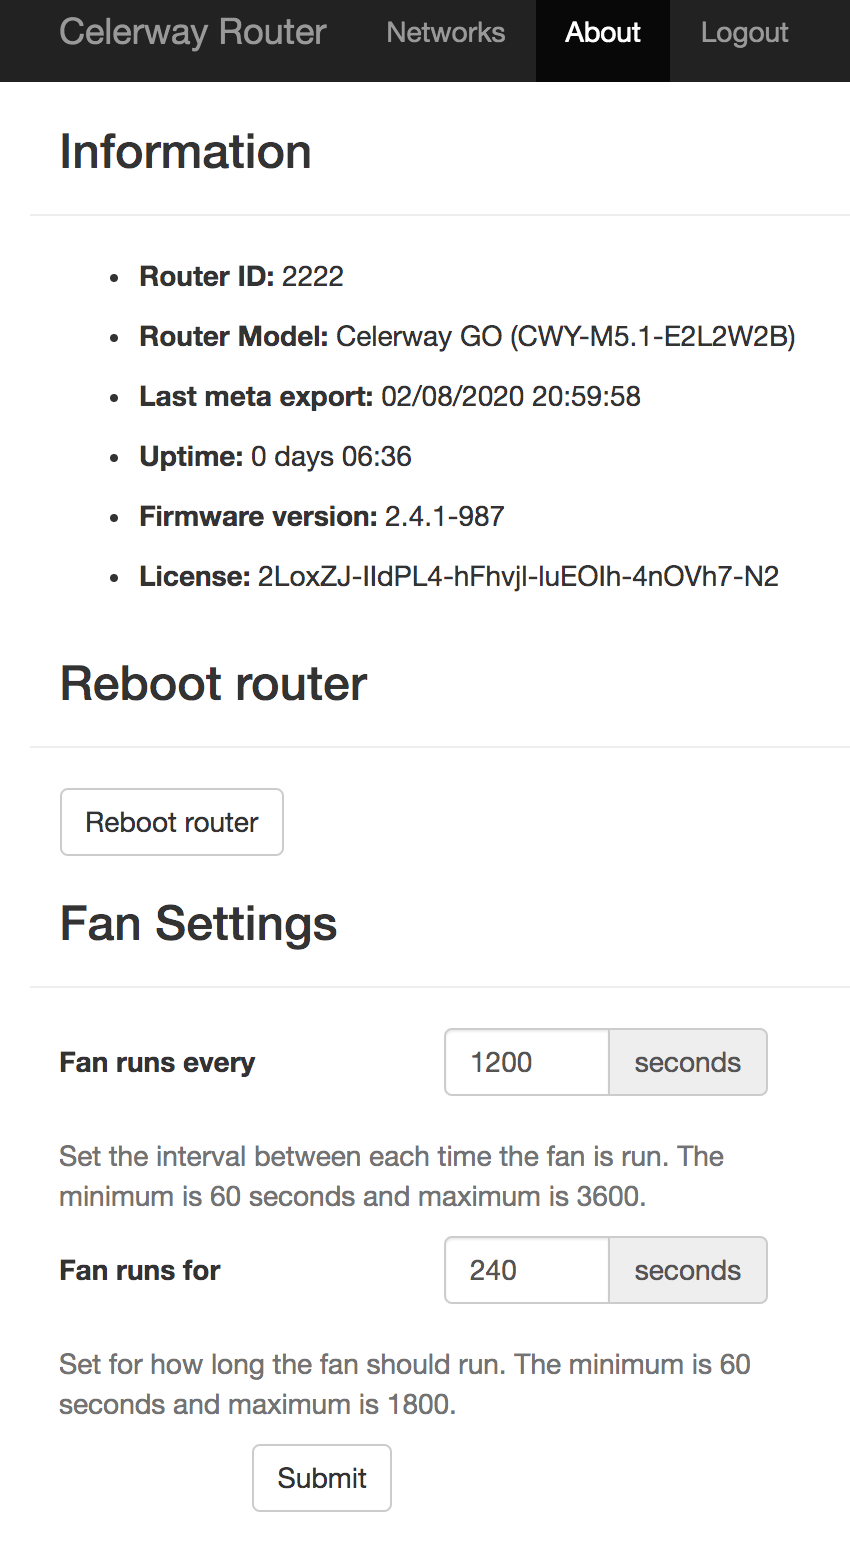
Cooling settings
Under the About menu, you find the menu where you can configure regular fan policy. If it is operating in warm environments, you could be more aggressive on how long or how often the fans should run.